How to Install a Green Roof

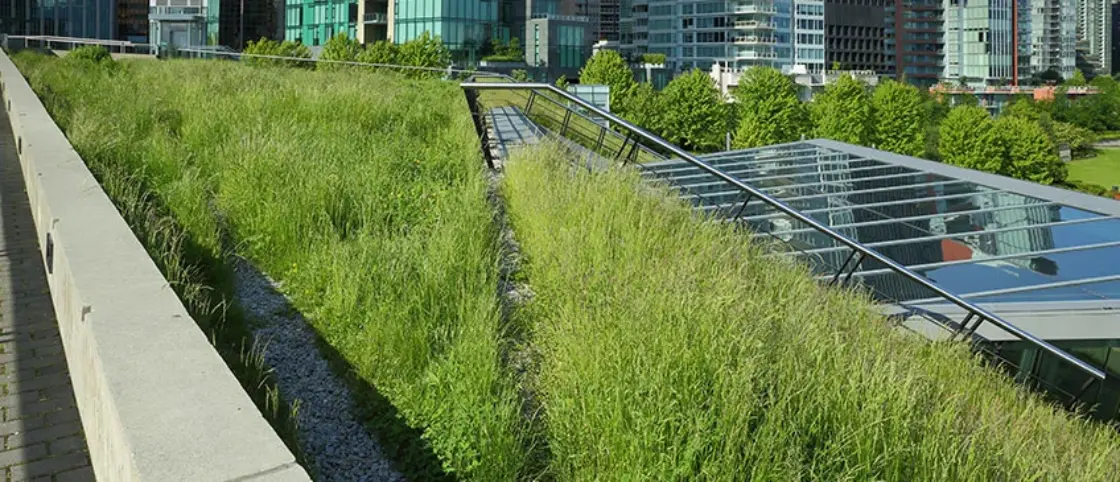
Until relatively recently green roofs were rare. You may notice green roofs frequenting homes in fairy tales and JR Tolkien novels. However, with climate change becoming a growing concern, more people are utilizing green roofs as a sustainable and stylish way to help insulate their home. In this article, we discuss the benefits of having a green and eco roof, and provide tips on how to use membrane, gavel, and other materials to design your very own.
Green Roof Benefits
Green roofs, those that are adorned with a plethora of succulents, offer many design based benefits for homeowners.
Energy Savings: One of the most important factors of an eco-roof is the energy savings it provides. The greater insulation offered by green roofs can reduce the amount of energy needed to moderate the temperature of a building. Roofs are often the greatest source of heat loss in the winter, while they are the hottest temperatures in the summer.
Increased Waterproofing Membrane: A green roof decreases the exposure of waterproofing membranes to large temperature fluctuations, which can cause micro-tearing and UV radiation.
Fire Retardation: Green roofs also have a much lower burning heat load than conventional roofs.
Water Diversion: An eco-roof can contribute to landfill diversion by prolonging the life of a waterproofing membrane.
Cleaner Water: Research carried out by Kohler & Schmidt in 1990 shows that 95% of the lead, copper and cadmium sulphide and 19% of the zinc that falls on the roof via the rainwater remains in the substrate.
Support the Urban Agricultural Movement: This movement is shown to reduce pollution and increase water quality, decreasing the demand for health care.
Habitat Recreation: Plants and soil help recreate habitat for butterflies, insects, and birds.
Aesthetically Pleasing: Green roofs are actually shown to improve productivity and morale in corporate environments!
Eco Roof Installation
If all of these benefits sound great to you, here is how to get started building your own eco-friendly roof.
Step 1: Prep the Roof
All roofs need to have some sort of pitch so that it sheds water toward your gutters. For a green roof installation, that pitch should be at least ¼ inch per foot run.
You’ll likely want to hire a structural engineer to ensure that the roof can support the weight of the plants.
As far as needing a permit, check with your municipality. Permit requirements can vary depending on what type of membrane you are installing.
Once your waterproofing membrane is installed, be sure to test it to ensure your roof is ready to be planted.
Step 2: Add Some Green
There are two ways to go about adding the plants to your roof. You can either use a modular system of planted living roof trays or add soil and plant your roof as through it were a garden on the ground.
One advantage to choosing a modular roof with trays is that they come pre-planted, therefore, you won’t have to worry about whether your plantings will take. Furthermore, they offer easier access to the waterproofing below and increased water retention.
However, the downside to a modular system is that you won’t have as much leeway in terms of creativity.
Pro Tip: Be sure to include a draining layer above your membrane and below your topsoil. You’ll also want to choose drought-tolerant grasses or succulents dependent on the climate you are planting in.
Step 3: Enjoy!
Take a step back and admire all of your hard work. We’re sure that your pockets will enjoy the energy savings and your eyes will be pleased by the view. Next, we discuss how to properly maintain your roof.
Green Roof Maintenance
Unless you are experiencing a severe drought, your roof will likely require very little maintenance. We suggest watering your roof a few times a year.
All roofs will require periodic wedding. Weeds are not only unsightly and annoying, but can also pose a serious threat to your overall system. Invasive woody species can harm underlying components like the waterproofing membrane. The more established and mature your plants are, the fewer weed problems you’ll have.
Additionally, you should inspect your eco roof for fungal diseases and insect problems on a regular basis. Fertilizing should be performed at least annually in the spring for the first 3-5 years after installation, and then on a reduced schedule is soil testing advises.
We’d love to hear from you! Do you have a green roof or are you thinking about making one soon? Leave us a comment below!


